
Christelor asked me on Youtube, "How do I deploy a Django Ninja API to production?".

So, here's how to do it.
We'll deploy Django to production, specifically a Django Ninja REST API (but this applies to any Django project).
Let's begin 🚀
Project Setup
- Create a new Django project with the following structure:
a. Install Django and django-ninja:
pip install django django-ninja gunicorn whitenoise
b. Create a new Django project:
django-admin startproject core .
c. Create the api app:
python manage.py startapp api
d. Create the necessary files:
touch api/api.py
touch requirements.txt
touch render.yaml
(If you can't use touch, just create the files in your favorite text editor.)
Your project structure should now look like this:
core/
├── manage.py
├── core/
├── api/
├── requirements.txt
└── render.yaml
- Update your
settings.pyfile with the following:
RENDER_EXTERNAL_HOSTNAME = os.environ.get('RENDER_EXTERNAL_HOSTNAME')
if RENDER_EXTERNAL_HOSTNAME:
    ALLOWED_HOSTS.append(RENDER_EXTERNAL_HOSTNAME)  # Adds the Render domain to the list of Django's allowed hosts


INSTALLED_APPS = [
    ...
    'api' # Our new app.
]
- Make the following additional changes to your
settings.pyfile:
import os


MIDDLEWARE = [
    'django.middleware.security.SecurityMiddleware',
    'whitenoise.middleware.WhiteNoiseMiddleware',
    ...
]

# Static files (CSS, JavaScript, Images)
# https://docs.djangoproject.com/en/5.0/howto/static-files/

# This setting informs Django of the URI path from which your static files will be served to users
# Here, they well be accessible at your-domain.onrender.com/static/... or yourcustomdomain.com/static/...
STATIC_URL = '/static/'

# This production code might break development mode, so we check whether we're in DEBUG mode
if not DEBUG:
    # Tell Django to copy static assets into a path called `staticfiles` (this is specific to Render)
    STATIC_ROOT = os.path.join(BASE_DIR, 'staticfiles')
    # Enable the WhiteNoise storage backend, which compresses static files to reduce disk use
    # and renames the files with unique names for each version to support long-term caching
    STATICFILES_STORAGE = 'whitenoise.storage.CompressedManifestStaticFilesStorage'
- Populate your
requirements.txtfile with your packages Assuming you're using pip and a virtual environment, run the following command in your terminal:
pip freeze > requirements.txt
Otherwise, do whatever you normally do to register packages.
- Create the
api.pyfile and add the following:
# api/api.py
from ninja import NinjaAPI

api = NinjaAPI()


@api.get("/hello")
def hello(request):
    return {"message": "Hello world"}
- Update the
core/urls.pyfile with the following:
from django.contrib import admin
from django.urls import path
from api.api import api


urlpatterns = [
    path('admin/', admin.site.urls),
    path('api/', api.urls),
]
- Run the development server to make sure everything works:
python manage.py runserver
And visit http://localhost:8000/api/docs to see Ninja's interactive API docs.
They should look like this:

- Add the following to your
render.yamlfile that we created earlier:
services:
  - type: web
    name: django-ninja-app
    env: python
    buildCommand: pip install -r requirements.txt
    startCommand: gunicorn core.wsgi:application
    envVars:
      - key: PYTHON_VERSION
        value: 3.11
      - key: DEBUG
        value: False
      - key: SECRET_KEY
        generateValue: true
Deploy to production
-
Create a new repository on GitHub and push your code.
-
Sign up for an account on Render.
-
In the Render dashboard, click on "New +" and select "Web Service".
-
Connect your GitHub repository.
-
Configure your web service: This looks like this:
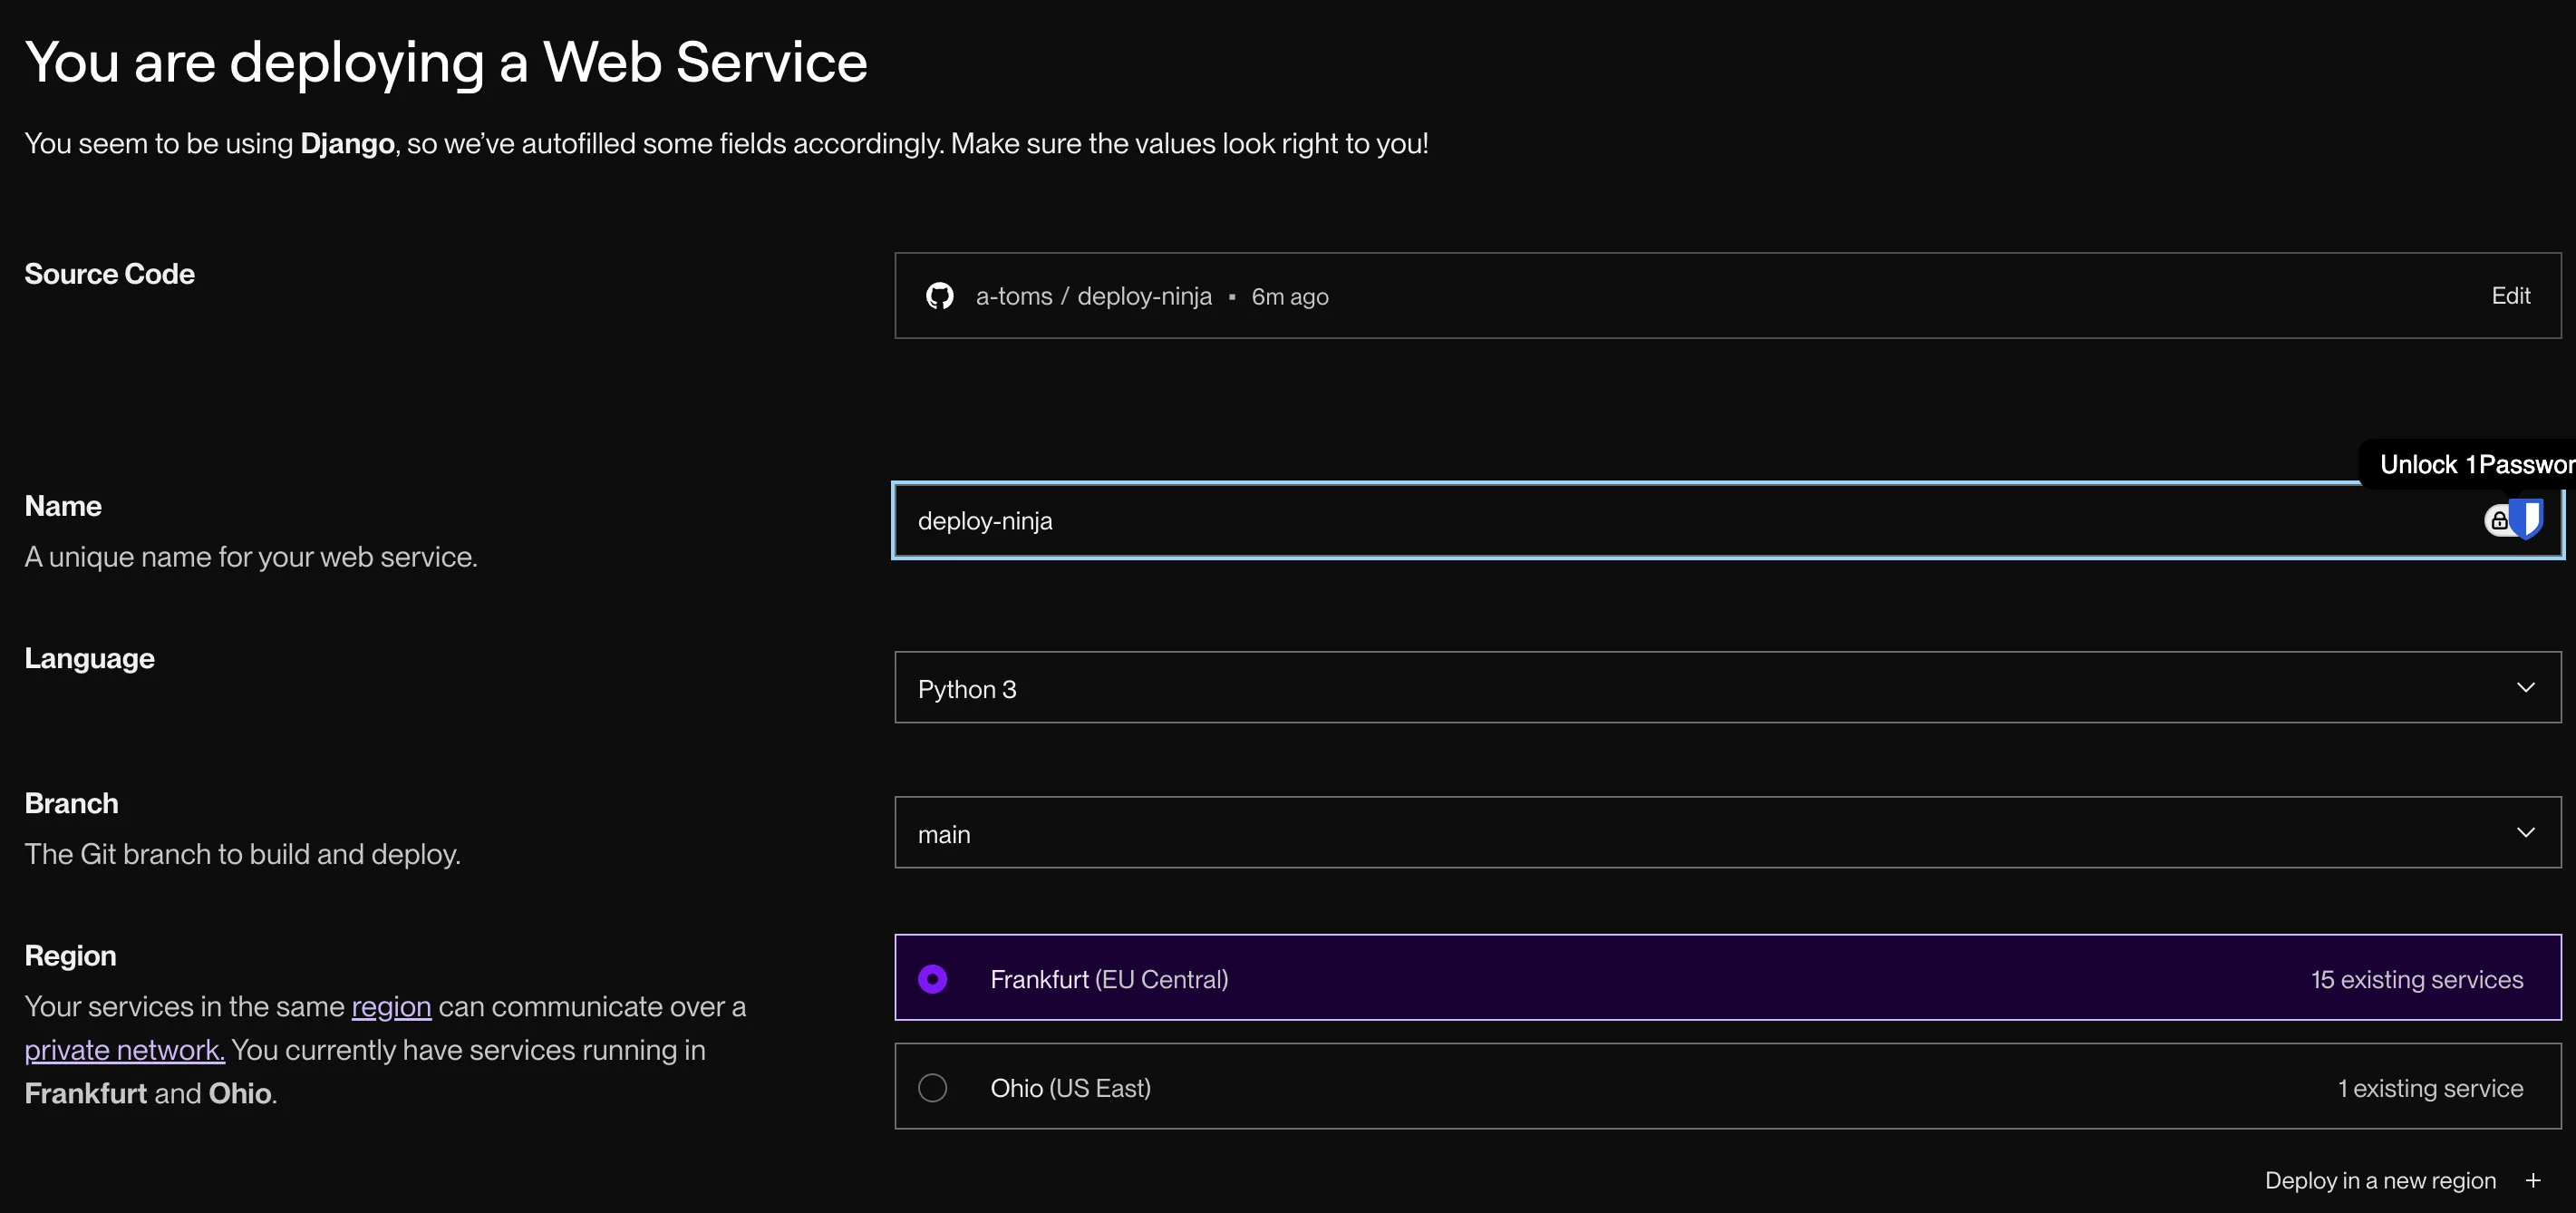
-
Name: Choose a name for your service
- Environment: Python
- Build Command:
pip install -r requirements.txt - Start Command:
gunicorn core.wsgi:application -
Environment Variables: Add the following:
- Key:
PYTHON_VERSIONValue:3.11 - Key:
DEBUGValue:False
- Key:
-
Click "Create Web Service".
On push, Render will automatically deploy your Django Ninja API using the configuration in the render.yaml file.
If you see any errors, check the "Logs" tab in Render and debug them.
Note: It's very common to miss something and have the first build fail. I normally find that for me. Just read the error carefully, and fix it. Then push again.
Access your online Django app
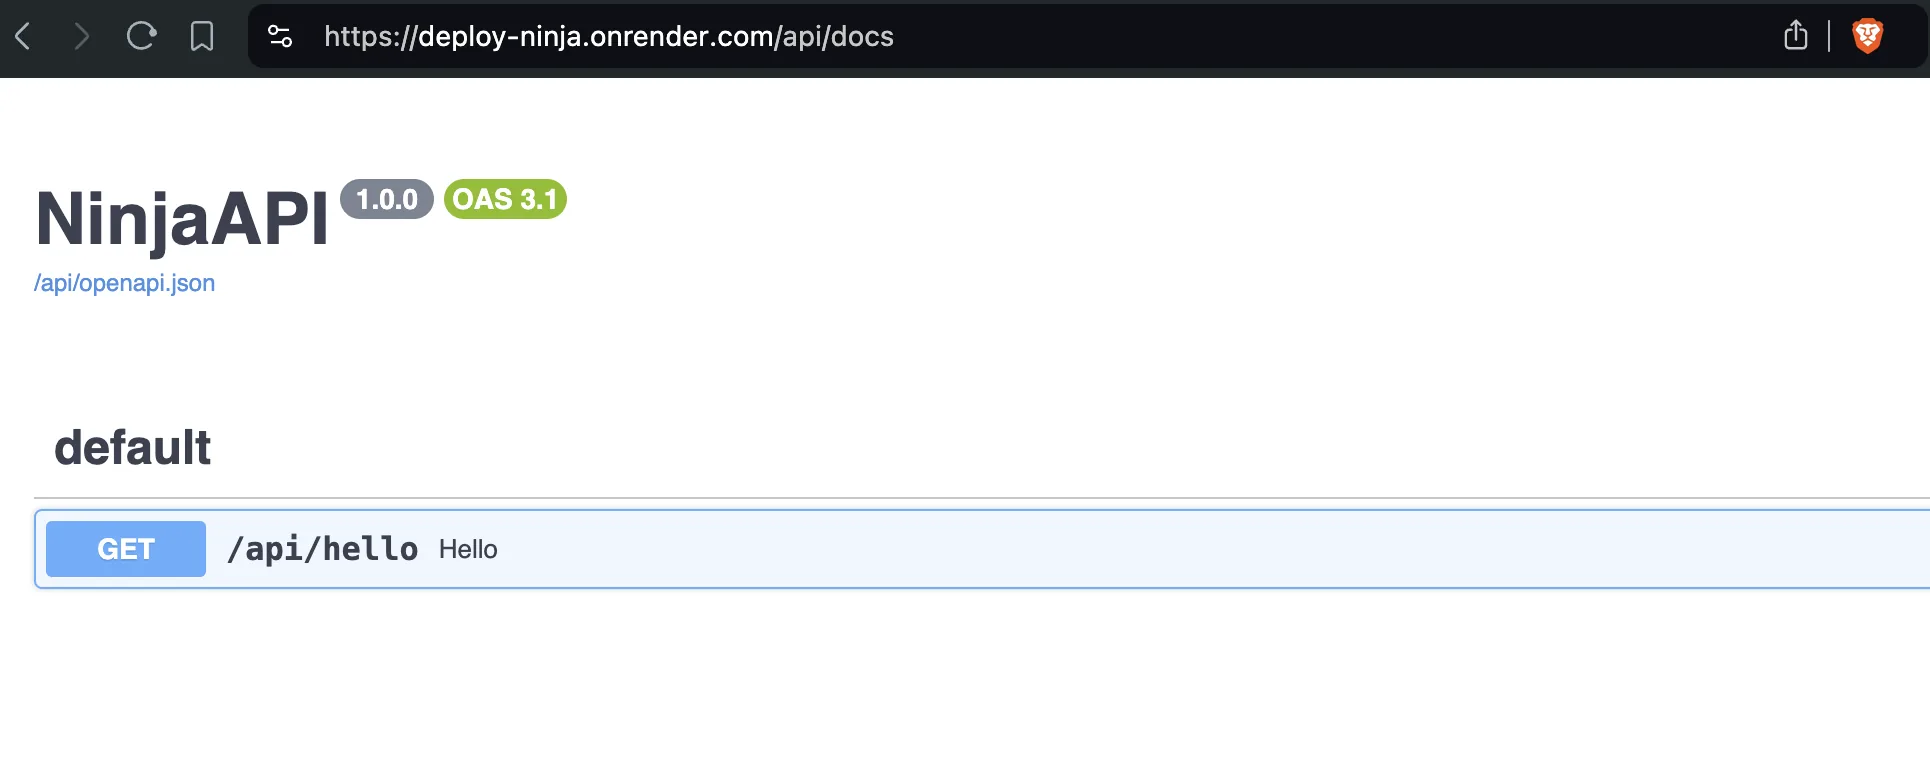
Your API will be accessible at the URL provided by Render, typically in the format: https://<your-service-name>.onrender.com/api/hello
Here's what my API looked like when I deployed it:
Complete 🎉 Next steps: other guides of mine you might like
Congrats - you can now get your products online for people to use. Let's make your app even more powerful. Here are some guides of mine you might like:
Want to use Django's session authentication with a frontend app (it's great - much better than JWTs)? See my guide: Use React with Django Ninja (including Auth) in 15 mins ⚡️
Want to use Vue 3 with Django and auth? See my guide: Use Vue with Django (including Auth) in 15 mins 🍒
Want to use Django with Next.js? See my guide:Django Ninja + Next.js - 2 powerful frameworks 🥷⚛️
